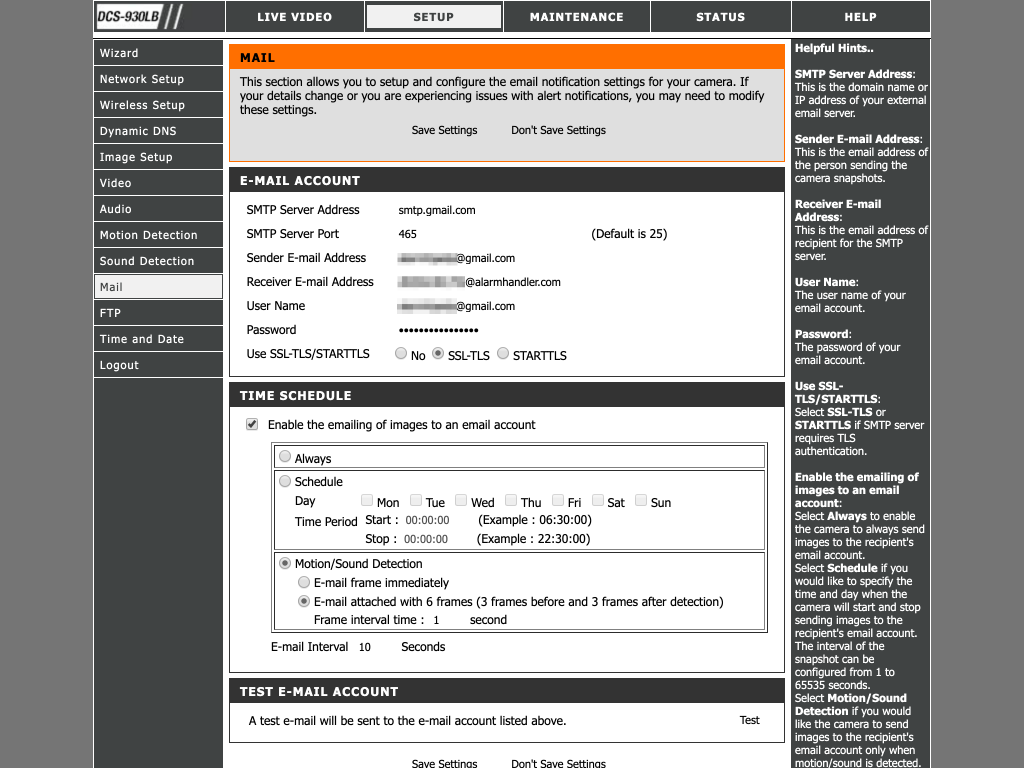
Here’s some screen shots on how to fill in the detection and mail screens on D-Link 9XX series of IP cameras. Before you do this, you need to add the camera in the Alarmhandler app. Do do so, select + on the main screen and select “IP Camera”.
- First get your camera connected to your local network – see also information on how to connect using WPS and without WPS.
- Then we need to know the IP address of your camera on your local network. We suggest using the FING app which scans your network and lists the connected devices along with the IP address.
- Then connect to your D-Link camera using a browser. This works fine in browsers like Safari and Firefox, but D-Link cameras do not like Chrome (but you may be able to fool the camera to accept Chrome by turning on Developer Mode and choose to use a device like an iPad – this makes the camera think its Safari that is trying to connect).
- Login to camera. D-Link cameras are normally password protected, which means your browser will prompt you for username and password. Username is admin and password might be empty, admin, or something you’ve specified earlier. In case you don’t know, you need to reset the camera by pressing a pen or other small object into the reset port on the back.
- After you’re connected, you can navigate to the setup tab, then Motion Detection and configure the camera as follows:

- After your configuration has been saved, tab on Mail and configure the camera as follows:

- After your configuration has been saved, tap Test to test sending an image using the specified mail connection.
NOTE: We’ve tested Alarmhandler has been tested with D-Link DSC-930A, 930B, 932, 933 and 942. Please let us know and perhaps send screen shots if you’ve tested with other cameras, then we can include those in a guide.

